Pasta & Noodles
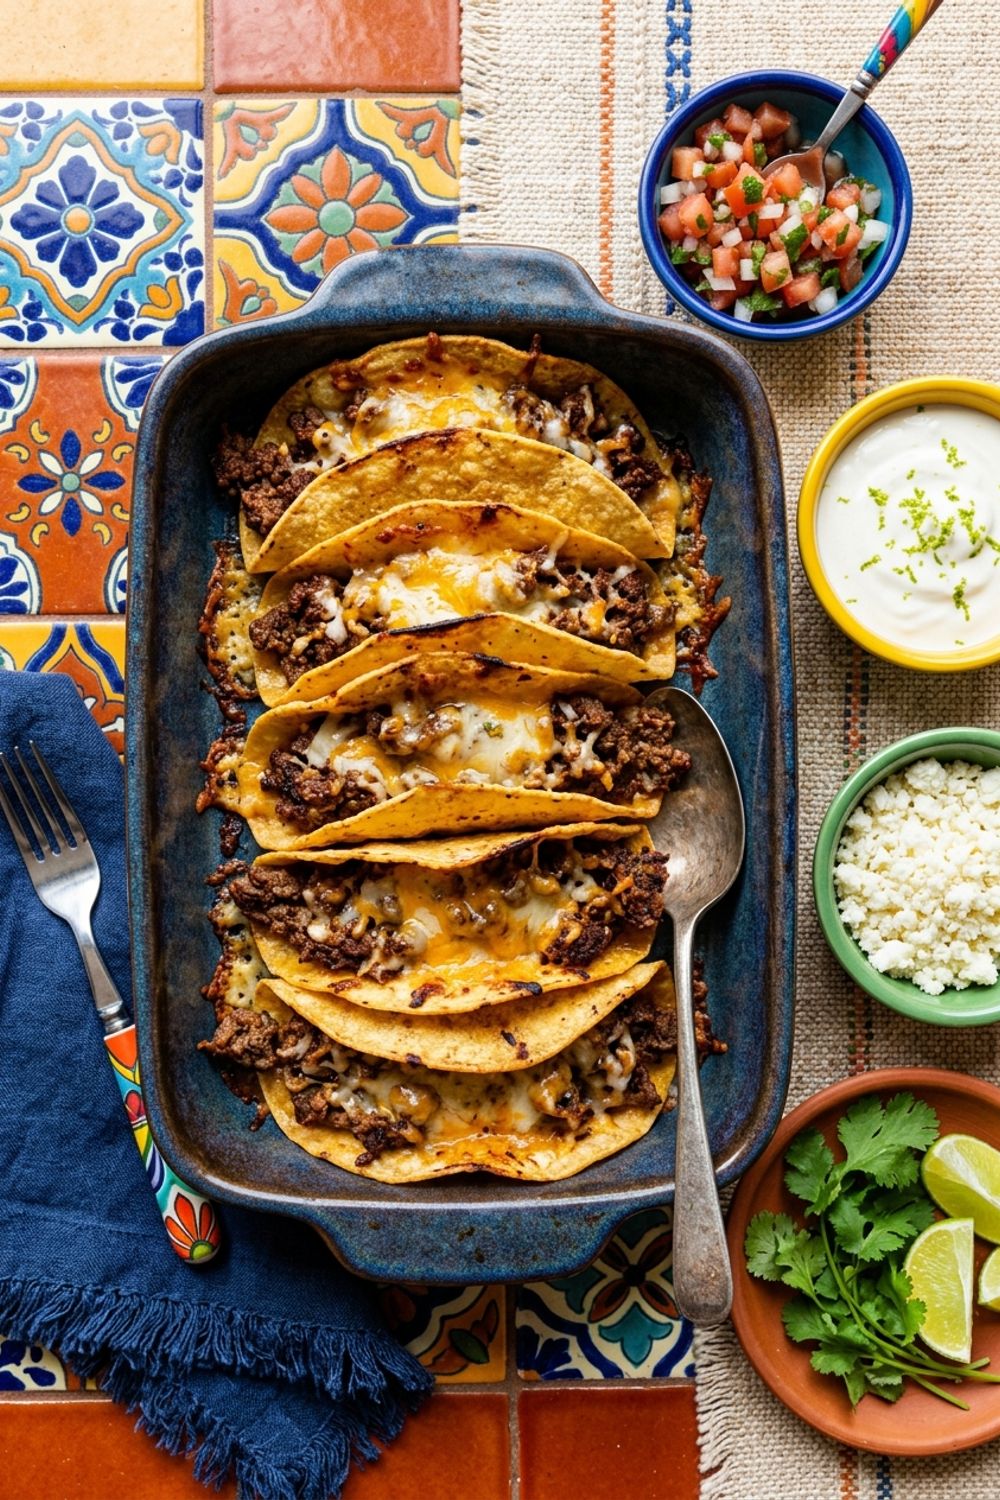
Oven-Baked Cheesy Tacos
Why This Recipe Is Special
Let me tell you about the night I accidentally invented my favorite taco method. I was making regular tacos — ground beef, hard shells, the usual Tuesday-night lineup — when I got distracted by a phone call and left the filled tacos sitting in a baking dish. In a moment of “well, let me just melt the cheese properly,” I popped the whole tray in the oven. Fifteen minutes later, something magical had happened. The shells were extra crispy, the cheese had melted into every crevice and formed golden, crunchy edges where it dripped onto the baking dish, and the meat had settled into the shells in a way that made every bite perfectly proportioned. I have never gone back to assembling tacos the old way.
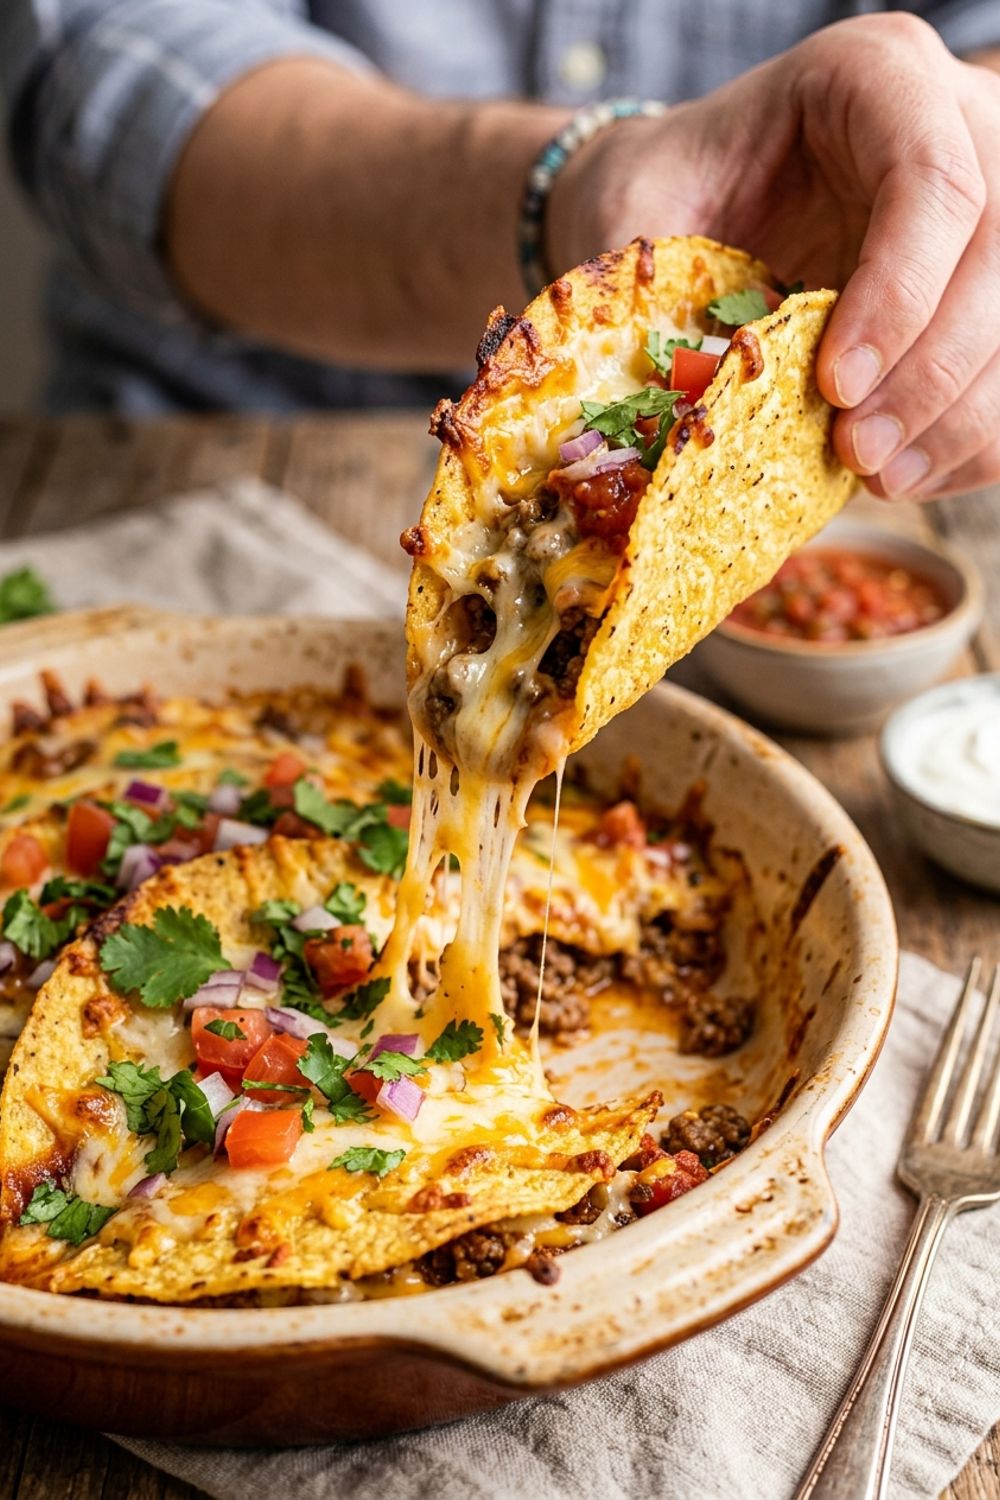
What makes oven-baked tacos fundamentally different from traditionally assembled tacos is the cohesion. When you build a taco cold and eat it immediately, the components stay separate — you get a bite of shell, then meat, then cheese, and they never quite merge. When you bake them, the cheese melts and acts as a glue, binding the meat to the shell and creating a unified structure that holds together beautifully as you eat. The shells get extra crispy from the dry oven heat. The cheese that drips between the tacos and onto the dish forms what I call “cheese frico edges” — thin, crunchy, lacey sheets of baked cheese that are arguably the best part of the entire dish.
And here is what really sends this recipe over the top: the contrast between the hot, crispy baked taco and the cold, fresh toppings added after baking. Cool sour cream, crispy lettuce, juicy tomatoes, creamy avocado — they all hit differently when placed on top of a scorching hot, cheese-encrusted taco shell. It is the same principle that makes a hot fudge sundae work — temperature contrast amplifies flavor. This is a recipe that turns ordinary taco night into something the whole family gets genuinely excited about, and it is easier than the traditional method to boot. The entire cooking process, from browning the meat to pulling the tacos from the oven, takes about 30 minutes — and most of that time the oven is doing the work for you while you prep the toppings and set the table. It is the kind of efficient, crowd-pleasing recipe that every home cook needs in their back pocket.
Building the Perfect Taco Seasoning from Scratch
I stopped buying taco seasoning packets years ago, and once you taste the difference, I think you will too. Those little packets are mostly salt, sugar, and modified corn starch with a dash of spice mixed in. Making your own takes about 30 seconds of measuring and the flavor difference is striking — fresher, more complex, and fully customizable to your heat preference.
The base of my taco seasoning is chili powder, which is itself a blend of dried chili peppers, cumin, garlic powder, and oregano. I add extra cumin on top of that for a deeper, earthier warmth, and smoked paprika for a subtle smokiness that mimics the flavor of cooking over an open flame. The garlic powder and onion powder are supporting players that add savory depth without the moisture that fresh garlic and onion bring. And cayenne — just a quarter teaspoon — provides a gentle background heat that builds with each bite without overwhelming anyone at the table.
The real difference-maker is tomato paste. Most taco recipes just add water to the seasoned meat, which works fine but gives a thin sauce. A tablespoon of tomato paste concentrated in that same water creates a rich, clingy coating that adheres to every crumble of beef. It adds body, a slight sweetness, and a gorgeous reddish color that screams “taco.” I dissolve the tomato paste in the water before adding it to the pan, which helps it distribute evenly rather than sitting in one concentrated blob. Simmer this mixture down until the meat looks saucy but not soupy — the filling should be moist enough to be flavorful but dry enough that it does not turn the taco shells soggy during baking. This balance is crucial for oven-baked tacos specifically, where excess moisture is the enemy of a crispy shell.
The Cheese Strategy
Not all cheese is created equal when it comes to oven-baked tacos, and I have strong opinions about this. You need two types of cheese working together — a good melting cheese for the gooey, stretchy factor, and a sharper cheese for actual flavor. This is why I use both Mexican blend (which typically contains Monterey Jack, cheddar, queso quesadilla, and asadero) and sharp cheddar in this recipe.
The Mexican blend melts beautifully — it goes gooey and stretchy, forming those satisfying cheese pulls when you pick up a taco. But on its own, it is pretty mild. That is where the sharp cheddar comes in. It has a more assertive, tangy flavor that stands up to the bold taco seasoning and actually tastes like something. Together, you get the best of both worlds: a melt that is both visually dramatic and flavorfully satisfying.
Here is my technique for maximizing the cheese: spread a thin layer on the bottom of the baking dish before placing the shells, stuff cheese inside the tacos with the meat, pile more cheese on top, and intentionally let some cheese fall between the shells. That cheese in the bottom and between the shells is what creates the frico — those crispy, lacey cheese edges that are practically the reason to make oven-baked tacos in the first place. When you pull the tacos out of the dish, those cheese edges come with them, adding an addictive crunch that no amount of regular cheese can replicate. Some people call it “bonus cheese.” I call it “the whole point.”
Tips for Perfect Results
Use 80/20 ground beef. Leaner ground beef (like 93/7) will give you drier, crumblier taco meat. The fat in 80/20 keeps the meat juicy and helps carry the seasoning flavors. You can drain some of the rendered fat after browning if you prefer, but leave at least a tablespoon — it is essentially liquid flavor.
Pack the tacos snugly in the dish. The shells need to lean against each other for support during baking. A 9x13-inch dish fits 12 standard-size hard taco shells perfectly. If you have fewer tacos, crumple small balls of foil and place them at the ends to prop the last shells upright. Shells that tip over during baking spill their filling and do not crisp evenly.
Do not add fresh toppings before baking. This might seem obvious, but I have seen recipes that suggest adding lettuce before the oven step. Baked lettuce is a soggy nightmare. Everything fresh and cool goes on after the tacos come out of the oven. The temperature contrast between the hot baked taco and the cold fresh toppings is half of what makes this dish so good.
Do not skip the cheese on the bottom of the dish. That thin layer of cheese on the bottom of the baking dish is not just for flavor — it serves a structural purpose too. It melts and forms a crispy, golden cheese crust that sticks to the bottom of the taco shells, giving each one a built-in cheese skirt that adds incredible crunch. This is honestly one of the best parts of the entire recipe, and it happens almost by accident. Make sure you use a generous handful down there, not just a sprinkle.
Broil for the last 2 minutes. Switching to broil at the end creates those gorgeous golden-brown cheese bubbles on top. Watch it like a hawk — the difference between perfectly browned and burnt cheese is about 30 seconds under a broiler. Keep the oven door cracked so you can monitor the progress in real time.
Set up a topping bar. Part of the joy of taco night is customization. Set out all the toppings in small bowls so everyone can build their perfect taco. Kids can skip the jalapenos and load up on sour cream, while adults can go heavy on the hot sauce and cilantro. This also takes the pressure off you as the cook — once the tacos come out of the oven, your job is done.
Variations to Try
One of the best things about oven-baked tacos is how endlessly customizable they are. The technique stays the same — fill, stand, cheese, bake — but the fillings can change completely to suit your mood or what is in your fridge.
Chicken Taco Version: Replace the ground beef with 1.5 lbs of shredded rotisserie chicken. Mix the chicken with the taco seasoning and a few tablespoons of chicken broth to moisten, then fill and bake as directed. The chicken version is lighter and the shreds hold the cheese beautifully.
Breakfast Baked Tacos: Fill the shells with scrambled eggs mixed with cooked chorizo, then top with cheese and bake for 8-10 minutes. Top with pico de gallo, avocado, and hot sauce for the best weekend breakfast. The eggs set up perfectly in the oven and the shells get extra crunchy.
Black Bean and Sweet Potato Tacos (Vegetarian): Roast cubed sweet potato at 425°F (220°C) for 20 minutes, then mix with seasoned black beans. Fill the shells, top with cheese, and bake as directed. The sweet potato adds a natural sweetness that pairs beautifully with the smoky taco spices, and the black beans provide protein and creaminess.
BBQ Pulled Pork Baked Tacos: Fill the shells with leftover pulled pork mixed with your favorite barbecue sauce, top with cheddar and pepper jack cheese, and bake as directed. Top with coleslaw instead of lettuce for a Southern-meets-Mexican mashup that is absolutely incredible. The tangy coleslaw and smoky pork are a match made in heaven inside a crispy shell.
Walking Taco Bake: Crush a bag of Fritos or tortilla chips in the bottom of the baking dish, spread the seasoned meat over the chips, and top with cheese. Bake until bubbly, then add all the taco toppings. It is less traditional but absolutely addictive — like nachos and tacos had a delicious baby.
How to Store
Leftover baked tacos (without the fresh toppings) can be stored in an airtight container in the refrigerator for up to 3 days. Reheat in a 350°F (175°C) oven for 8-10 minutes to re-crisp the shells and re-melt the cheese. The microwave works in a pinch but will soften the shells rather than crisping them. Always add fresh toppings after reheating.
The taco meat stores beautifully on its own — refrigerate for up to 4 days or freeze for up to 3 months. I often make a double batch of meat and freeze half for future taco nights. When ready to use, thaw overnight in the refrigerator, then reheat in a skillet with a splash of water to loosen the sauce. Fill fresh shells and bake as directed. This make-ahead approach turns taco night into a 15-minute affair on busy weeknights.
Troubleshooting
The taco shells are soggy. The meat filling was too wet. Make sure to simmer the seasoned meat until the sauce is thick and coating the beef, not pooling at the bottom of the pan. If the meat seems too moist, cook it for a few extra minutes uncovered. Also ensure you are using hard taco shells, not soft tortillas, if you want maximum crunch.
The cheese did not brown on top. Your oven may run cool, or the tacos were on a rack too far from the heating element. Broiling on high for the last 1-2 minutes should fix this. Make sure the tacos are on the upper-middle rack, about 6 inches from the broiler element, for the best browning results.
The tacos fell over during baking. They were not packed tightly enough. The shells should be snug against each other with no gaps. If your baking dish is too large for the number of tacos, use a smaller dish or fill the gaps with crumpled foil. You can also place a smaller oven-safe dish inside the larger one to reduce the space.
The meat tastes bland. Season more aggressively. Taco seasoning should taste slightly too intense on its own because it will be tempered by the cheese, shell, and fresh toppings. Add more salt first, then adjust the chili powder and cumin. A squeeze of lime juice into the meat just before filling the shells can also brighten the flavor dramatically.
These oven-baked cheesy tacos have become an absolute staple in my kitchen, and I think they are about to become one in yours too. They are faster, less messy, and genuinely more delicious than traditional assembled tacos. The crispy shells, the gooey cheese, those incredible cheese frico edges, and the pile of cool, fresh toppings on top — it is taco night perfected. I have served these at Super Bowl parties, weeknight family dinners, and casual get-togethers, and the reaction is always the same: pure delight. Kids love them because they are fun and cheesy, adults love them because the seasoning is bold and the toppings are customizable, and I love them because they are ridiculously easy. If you only try one recipe from my collection, make it this one — your family will thank you, and taco Tuesday will never be the same again.
Never Miss a Recipe
Join 5,000+ home cooks and get new recipes straight to your inbox.
Ingredients
Taco Meat
Tacos
Toppings
Instructions
- 1
Cook the Taco Meat
Heat a large skillet over medium-high heat. Add the ground beef and cook, breaking it up with a wooden spoon, for 5-6 minutes until browned and no pink remains. Drain excess fat if desired, leaving about 1 tablespoon in the pan. Add the diced onion and cook for 3 minutes until softened. Add the garlic and cook for 30 seconds.
- 2
Season the Meat
Add the chili powder, cumin, smoked paprika, garlic powder, onion powder, cayenne, salt, and pepper to the meat. Stir to coat evenly. Add the tomato paste and water, stirring until the tomato paste dissolves. Simmer for 4-5 minutes until the liquid reduces and the meat is saucy and well-coated. Taste and adjust seasoning.
- 3
Prepare the Baking Dish
Preheat your oven to 400°F (200°C). Lightly spray a 9x13-inch baking dish with cooking spray. Sprinkle a thin layer of Mexican blend cheese across the bottom of the dish — this will melt and form a cheesy base that keeps the taco shells from sliding around and adds extra cheese to every bite.
- 4
Fill the Taco Shells
Spoon the seasoned meat into each taco shell, filling them generously. Stand the filled shells upright in the baking dish, leaning them against each other for support. Pack them snugly so they stay upright during baking. Top each taco with a generous handful of shredded cheddar and Mexican blend cheese, making sure some falls between the tacos.
- 5
Bake Until Crispy and Melty
Bake at 400°F (200°C) for 12-15 minutes until the cheese is completely melted, bubbly, and beginning to brown at the edges. The taco shells should be extra crispy from the oven heat. For even crispier cheese edges, broil on high for the last 1-2 minutes, watching carefully to prevent burning.
- 6
Add Fresh Toppings and Serve
Remove from the oven and let cool for 2-3 minutes. Top each taco with shredded lettuce, diced tomatoes, avocado slices, sour cream, pickled jalapenos, and fresh cilantro. Serve with lime wedges and hot sauce on the side. The contrast between the hot, crispy, cheesy taco and the cool, fresh toppings is what makes these irresistible.
Nutrition Information
Per serving (serves 6). Values are approximate.
| Calories | 410 calories |
| Total Fat | 24g |
| Saturated Fat | 12g |
| Carbohydrates | 22g |
| Sugar | 3g |
| Protein | 28g |
| Sodium | 750mg |
| Fiber | 3g |
* Percent Daily Values are based on a 2,000 calorie diet. Your daily values may be higher or lower depending on your calorie needs. Nutritional information is an estimate and may vary.
Frequently Asked Questions
Can I use ground turkey instead of beef?
Yes, ground turkey works well. Since turkey is leaner, add an extra tablespoon of olive oil when cooking to prevent it from drying out. The seasonings remain the same. Ground chicken, pork, or a blend also work — just adjust the fat content as needed.
How do I keep the taco shells from breaking when I fill them?
Warm the taco shells in the oven at 300°F for 3-4 minutes before filling — this makes them more pliable and less prone to cracking. If using flour tortillas, fold them into a taco shape and stand them in the dish; the cheese will hold them together as it melts.
Can I make this with soft tortillas?
Absolutely. Use small flour or corn tortillas, fill them with the meat and cheese, fold in half, and lay them overlapping in the baking dish like dominos. The edges will crisp up in the oven while the centers stay soft. This creates a different but equally delicious texture.
Can I prep these ahead of time?
You can make the taco meat up to 3 days in advance and refrigerate it. Assemble and bake the tacos just before serving. I do not recommend assembling them ahead of time as the shells will soften from the moisture in the meat. Fresh toppings should always be added right before eating.

Hi, I'm Lisa!
I create simple, tested recipes from around the world that anyone can make at home.
Learn More →Reader Reviews
Based on 98 reviews